Step 7: Generating an IDE Ready Embedded C Source Code Project
You are ready to generate a C project when:
Setup a name, location and other settings before generating the C code
project.
Workflow steps:
-
Select "Settings" from the STM32CubeMX "Project" menu.
A mult-tab Project Settings dialogue will be displayed.
-
View the Project tab to provide the project with a name and
location, as well as select the IDE for which the embedded C project
should be created.
-
View the Code Generator tab and set the automatic code generation
options as required. Options include whether assert() should
be used, and whether the project should include the source files
for all the STM32 peripheral drivers - or just for the peripheral
drivers that have been specifically selected.
|
Click images to enlarge
|

The Project tab
|

The Code Generator tab
|
With the automatic code generation options set the IDE ready project
can be created.
Workflow steps:
-
Click "Generate Code" from the STM32CubeMX "Project" menu.
If the STM32Cube drivers necessary to create the project have
not already been downloaded then you will be guided through
the download and installation process.
-
When the IDE ready C project has been created you will be
prompted to open the directory into which the source files
were placed. View and generated files and experiment with
the created project.
-
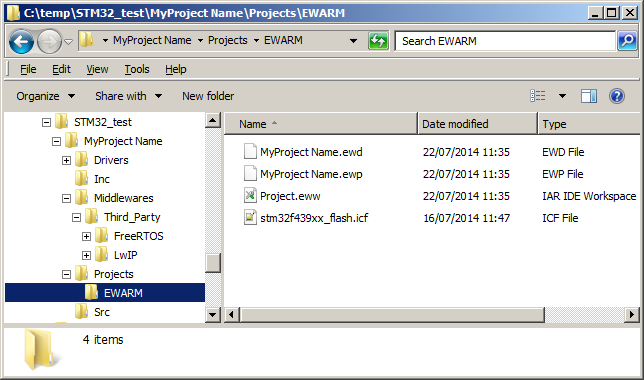
The IDE project files (IAR
in this case) within the generated directory structure
>>
On to step eight
<<
Back to the STM32CubeMX practical walk-through index
Copyright (C) Amazon Web Services, Inc. or its affiliates. All rights reserved.